
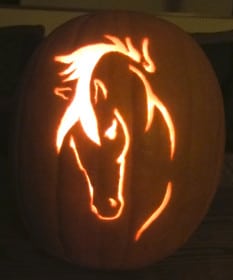
We’re nearing that time of year again—Halloween! Will you be carving a horse jack-o’-lantern for your front porch or barn? In this post you’ll find a horse jack-o’-lantern pattern and a tutorial on how to use scale drawing to resize any image. Who knows? By the end of this post you may decide to create your own design!
Pumpkins come in many sizes. If you have a horse stencil pattern that is too small or too large for your pumpkin, you’ll have to adjust the size of your pattern. How do you make your horse stencil the right size for your pumpkin? It’s easy, when you know a little math.
Scale drawing
Scale drawing is a method used to change the size of any image. When you know how to use this technique, you can make an image larger or smaller. Scale drawing can be used for many projects, not just carving a Halloween pumpkin. You might want to make a decorative sign or poster or a card to give to a friend.
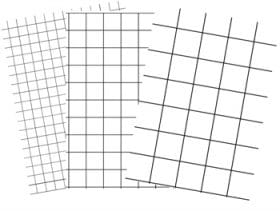 With scale drawing, an image is either drawn on an existing grid, or a grid is drawn over top of an already existing image.
Using a grid
If you want to make the image bigger, you choose a second piece of paper with a bigger grid to transfer the image onto. A bigger grid means the lines are farther apart.
Math Talk – grid: a framework of spaced lines that are parallel to or cross each other. Each little square is used as a measurement.
The important thing to remember when choosing a grid, or drawing your own, is that the new grid and your pattern image grid must have a 1:1 ratio. This is very important – otherwise your drawing will be distorted!
Math Talk – ratio: A ratio shows the relative sizes of two or more values. In this case, the ‘values’ are the grid with the image and the new grid on which you are going to transfer the image.
A 1:1 ratio means that you will have the exact same number of lines on the transfer grid paper as are on the image paper. It’s just that the lines will be a different distance apart.
 You may have various sizes of grid paper (also called graph paper) already at home. If not, you can download and print grid paper from a website or make your own by carefully drawing lines using a ruler and pencil.
I used a site that gave me the options shown above for one inch grid paper. I chose the lines to be non-bold. The number options, written in blue, refers to the number of blocks per inch. This means, the first option, ‘One’, is grid paper with the lines one inch apart.
1. If you chose ‘Two’ grid paper, how far apart will the lines be?
2. If you chose ‘Three’ grid paper, how far apart will the lines be?
3. If you chose ‘Four’ grid paper, how far apart will the lines be?
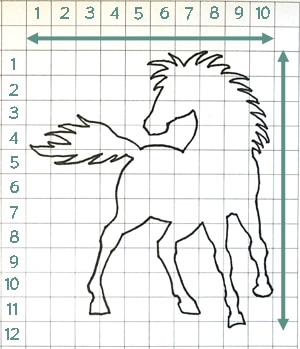
Scale: 1/2″
Click here to download your copy of the horse picture at the right. I drew the horse on 1/2 inch grid paper.
4. If you redraw the image on 1/4″ grid paper will the horse be bigger or smaller?
5. If you redraw the image on 1″ grid paper will the horse be bigger or smaller?
6. If you redraw the image on 1″ grid paper, what will the height of the resulting image be?
7. If you redraw the image on 1″ grid paper, what will the width of the resulting image be?
To redraw the image, focus on one square at a time. I found it useful to number each square across the top and along the side to help match up the squares as I went along.
Draw what you see in each small square into the corresponding larger one until the entire image has been transferred. Feel free to make changes as you go, lines for the mane or tail can easily be different and you can always redraw the lines until you’re satisfied.
Once the drawing is done, tape your new stencil to your pumpkin. If you pin the page to the pumpkin, you may end up with extra holes in your pumpkin.
Use a thumbtack to poke holes along the lines of the design so that when you remove the stencil, you will still have an outline visible on the face of the pumpkin. Poke the holes 1/4″ to 1/8″ apart. Make sure you get every detail of the image.
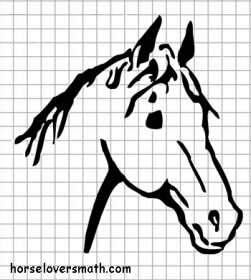
Here are two more posts with detailed instructions on how to draw your own grid and how to do a scale drawing—and more horse jack ‘o lantern patterns!

1. If you chose ‘Two’ grid paper, how far apart will the lines be?
Answer: There would be two lines per inch, so the lines would be 1/2 inch apart.
2. If you chose ‘Three’ grid paper, how far apart will the lines be?
Answer: There would be three lines per inch, so the lines would be 1/3 inch apart.
3. If you chose ‘Four’ grid paper, how far apart will the lines be?
Answer: There would be four lines per inch, so the lines would be 1/4 inch apart.
4. If you redraw the image on 1/4″ grid paper will the horse be bigger or smaller?
Answer: The horse will be smaller.
5. If you redraw the image on 1″ grid paper will the horse be bigger or smaller?
Answer: The horse will be bigger.
6. If you redraw the image on 1″ grid paper, what will the height of the resulting image be?
Answer: The height of the drawing is about 12 squares. Using 1” grid paper means the lines on the paper are 1” apart. The drawing would therefore be 12 inches high once it’s been transferred to 1” grid paper.
7. If you redraw the image on 1″ grid paper, what will the width of the resulting image be?
Answer: The width of the drawing is about 10 squares. Using 1” grid paper means the lines on the paper are 1” apart. The drawing would therefore be 10 inches wide once it’s been transferred to 1” grid paper.
Common Core:
4.NF.A – Extend understanding of fraction equivalence and ordering
5.NF.B.5a – Scaling whole numbers by fractions
6.RP.A – Understand ratio concepts and use ratio reasoning to solve problems
7.G.A.1 – Scale drawings


