
 Halloween is coming. Have you decided on a costume? Have you picked out a pumpkin? What is your pumpkin going to look like this year? A scary face? A ghost, cat or monster? Have you thought about carving a horse?
If you like the idea, this post will show you how to carve your own horse jack-‘o-lantern.
Pumpkins come in many sizes. If you have a horse stencil pattern that is too small—or too large for your pumpkin you’ll have to adjust the size of your pattern. How do you make your horse stencil the right size for your pumpkin? It’s easy, just use a little math.
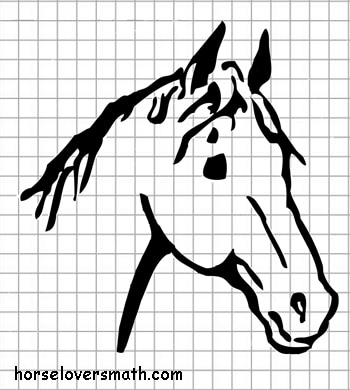
Here’s the horse head stencil you’ll be using.
We’re going to use a method called scale drawing. That’s where we start with one drawing, and enlarge it by a certain amount, called the scale.
The horse head stencil we’re providing (in the answers section) comes on a 1/8 inch grid and on a 1/4 inch grid. The choice is yours.
We also provide 1/2 inch graph paper for download (or you can use what you have at home) on which to create the enlarged stencil for your pumpkin.
The important thing to remember when choosing a grid, or drawing your own, is that the grid and your stencil image must have a 1:1 ratio. This is very important – otherwise your drawing will be distorted!
Basically, a 1:1 ratio means that you will have the exact same number of lines on your blank piece of graph paper as are on the horse stencil. It’s just that the lines will be farther apart on the new graph paper!
Do you need a little more information about ratio? Click here and you’ll find more posts on HLM that talk about ratio.
Do you have a huge pumpkin? Not a problem, you can make your own graph paper if you want an even bigger stencil. But it is important to remember, the lines must be equally spaced apart—perfect squares.
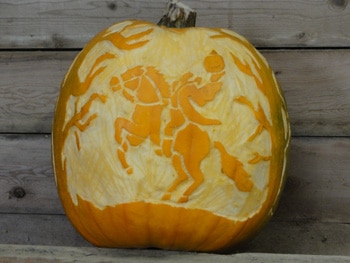
The headless horseman!
To draw a one inch grid, put your ruler at the top of the paper, and make a small mark at every inch. Place the ruler at the bottom of the paper and do the same thing. Then use the ruler to make a straight line connecting each dot at the bottom with its partner at the top.
Now place the ruler on the left side of your paper, and make a small mark at every inch. Then place the ruler on the right side of the paper, and do the same thing. Then, using your ruler, make a straight line connecting the dots on the left with their partners on the right.
That’s it, you’ve got a grid!
 Download and print out a stencil (see answers section). This is your reference image. Download and print out a piece of graph paper. This is what you will use to enlarge the horse head for a bigger pumpkin!
To enlarge the image, focus on one square at a time. Draw what you see in each small square into the corresponding larger one until the entire image has been transferred. Feel free to make changes as you go, make the mane bigger, like a Friesian’s, make the image simpler by only redrawing the outline, eye, nostril and mouth. You can always change it if you don’t like it and add more detail later.
Once you’re satisfied, tape or pin your new stencil to your pumpkin. If you pin the page to the pumpkin, put the pins on the edge of the image so you don’t end up with extra holes in your pumpkin.
Use a thumbtack to poke holes along the lines of the design so that when you remove the stencil, you will still have an outline visible on the face of the pumpkin. Poke the holes 1/4″ to 1/8″ apart. Make sure you get every detail of the image.
Carve the small details first, then move on to the larger sections.
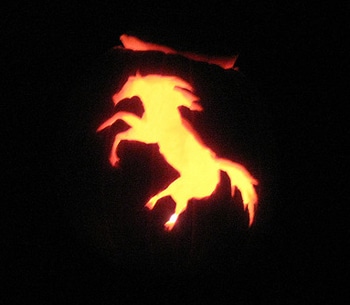
To create a final result with multiple tones, carve the outer skin from the pumpkin, but leave just enough of the white flesh in tact to allow some light to pass through. This can be tricky to do, so carve carefully!
Here is the stencil drawn on 1/4″ graph paper: Horse head stencil
Stencil on 1/8″ graph paper: horse head 1-8 inch grid
Here is the Horse Head Stencil with the grid lines showing through. Sometimes it is helpful to see these when creating your own drawing. Click to download: Horse head stencil with grid lines showing through.
Click half inch graph paper to download 1/2″ graph paper to use to create a larger horse head stencil. The lines for this sized grid go right to the edge of the paper. Depending on your printer, some lines may be missing at the side. But remember—you can create your own grid on any sized paper!
Do you have a smaller pumpkin? Use the horse head stencil laid out on 1/4″ graph paper.
Photos:
Pumpkins by Rich Bowen; CC BY 2.0
Headless horseman by Deborah Stacey
Horse Jack-o’-Lantern by Aldon Hynes; CC BY-SA 2.0


