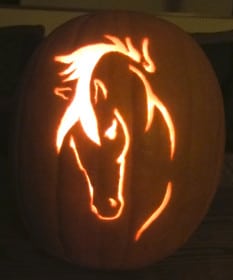
Have you started thinking about Halloween yet? Do you have a costume? What about a design for your jack ‘o lantern? Have you ever carved a horse jack ‘o lantern before? Maybe this is the year to give it a try!
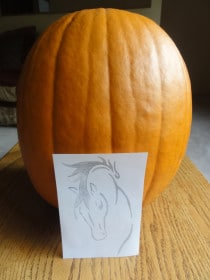
If you know how to use a grid to change the size of an image, you can use any stencil you want as a pattern for your pumpkin. The photo to the left shows the pattern and pumpkin I chose. What do you notice? Do you like the proportions?
Math Talk – proportion: a mathematical comparison between two or more numbers. In this case, the size of the pattern as compared to the size of the pumpkin.
Create a Grid
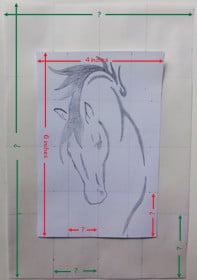
I wanted my pattern to be bigger. I felt it looked too small compared to the pumpkin I’d purchased at the farmer’s market. So, I created a grid on top of the pattern. A grid is a great way to change the size of a drawing. Here’s how to do it:
The dimensions of the pattern paper (in red) are 6 inches by 4 inches (15 cm by 10 cm).
I divided both the length and the width into 4 equal lengths.
1. How far apart are the lines along the longest side?
2. How far apart are the lines along the shortest side?
3. How many sections have now been created on the pattern piece?
The next step is to create another matching grid, on a larger-sized piece of paper. Because of the size of my pattern as compared to the size of the pumpkin, I wanted to enlarge my pattern by 1.5 times. The new sized paper had to be 1.5 times bigger than the pattern paper.
4. What should the dimensions be for the larger-sized paper?
5. How far apart are the lines along the longest side of the larger-sized paper?
6. How far apart are the lines along the shortest side of the larger-sized paper?
The number of sections on the pattern piece should equal the number of sections on the larger-sized grid paper.
Now that you have both grids prepared, begin drawing section by section onto the larger sized paper. In each corresponding section, draw what matches. Copy the lines as they appear in each section, onto the larger grid. What you end up with is an enlarged picture!
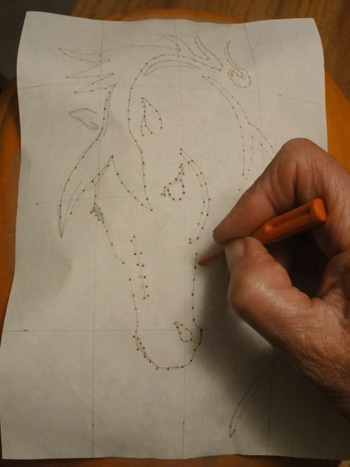
Attach your pattern to your pumpkin and with tape or straight pins. If using pins, place them on design lines to avoid extra holes in your pumpkin.
Transfer the design by poking holes, about 1/8″ (.5 cm) apart, along design lines. Make sure all the lines have been transferred and then remove the pattern. If the design is hard to see, connect the dots with a pen or pencil.
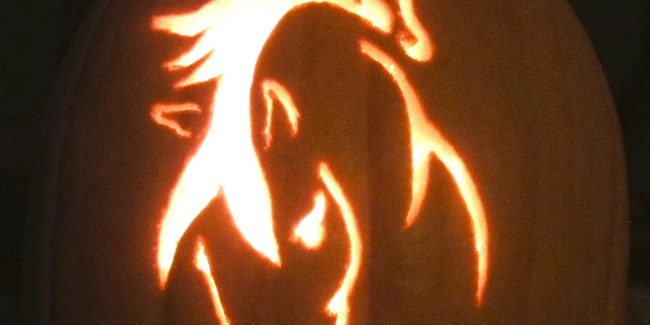
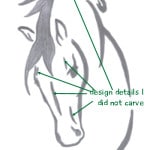
Now it’s time to carve! You may find you need help with this stage as well. I used special pumpkin carving tools. They allow for more control and the ability to carve finer lines. Even then, there were certain parts of the pattern I left out, some of the finer details. Can you spot them?
Do you like this pattern? If you’d like to use it for your Halloween pumpkin this year, click here to download the pattern!
1. How far apart are the lines along the longest side?
Imperial Answer: 6 inches ÷ 4 = 1.5 inches. Each line is 1.5 inches apart.
Metric Answer: 15 cm ÷ 4 = 3.75 cm. Each line is 3.75 cm apart.
2. How far apart are the lines along the shortest side?
Imperial Answer: 4 inches ÷ 4 = 1 inch. Each line is 1 inch apart.
Metric Answer: 10 cm ÷ 4 = 2.5 cm. Each line is 2.5 cm apart.
3. How many sections have now been created on the pattern piece?
Answer: 16.
4. What should the dimensions be for the larger-sized paper?
Imperial Answer:
Length: 6 inches × 1.5 = 9 inches.
Width: 4 inches × 1.5 = 6 inches.
The larger sized piece of paper should be 9 inches by 6 inches.
Metric Answer:
Length: 15 cm × 1.5 = 22.5 cm.
Width: 10 cm × 1.5 = 15 cm.
The larger sized piece of paper should be 22.5 cm by 15 cm.
5. How far apart are the lines along the longest side of the larger-sized paper?
Imperial Answer: 9 inches ÷ 4 = 2.25 inches. The lines along the longest side will be 2.25 inches apart.
Metric Answer: 22.5 cm ÷ 4 = 5.625 cm. The lines along the longest side will be 5.63 cm apart.
6. How far apart are the lines along the shortest side of the larger-sized paper?
Imperial Answer: 6 inches ÷ 4 = 1.5 inches. The lines along the short side will be 1.5 inches apart.
Metric Answer: 15 cm ÷ 4 = 3.75 cm. The lines along the short side will be 3.75 cm apart.
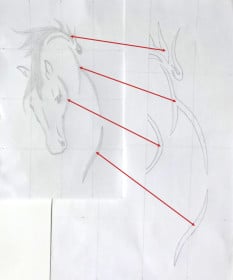
As to what pattern details I did not carve, check out the image to the left. One thing I learned from this is not to make pattern details too fine. It makes it too hard to carve—at least it did for me! I’m still happy with the way it turned out.
Common Core:
4.NF.C.6 – Model decimals
5.NF.B.5a – Scaling whole numbers by fractions
5.NBT.B.7 – Division with decimal quotients
Photos:
All photos by Deborah Stacey


